Yes, you read that right... for $8 you can run linux on a RISC-V computer.
And not just a stripped down kernel without an MMU.
No, the Ox64 comes with capable RISC-V cores.
Heck, and not just one core, but three cores (all different.)
Exciting times!
Caveat Emptor! At the time of writing, ethernet, wifi and SD-Card are not working. It's good to realize this before jumping into this.
It looks like a microcontroller, but behaves like a UNIX machine. Sweet, or what?
Getting it up and running, though, is far from trivial.
There are so many hurdles to take!
Hurdle 1: You cannot program it using USB, like you would an Arduino, ESP32, Stamp-C3 or rPi Pico.
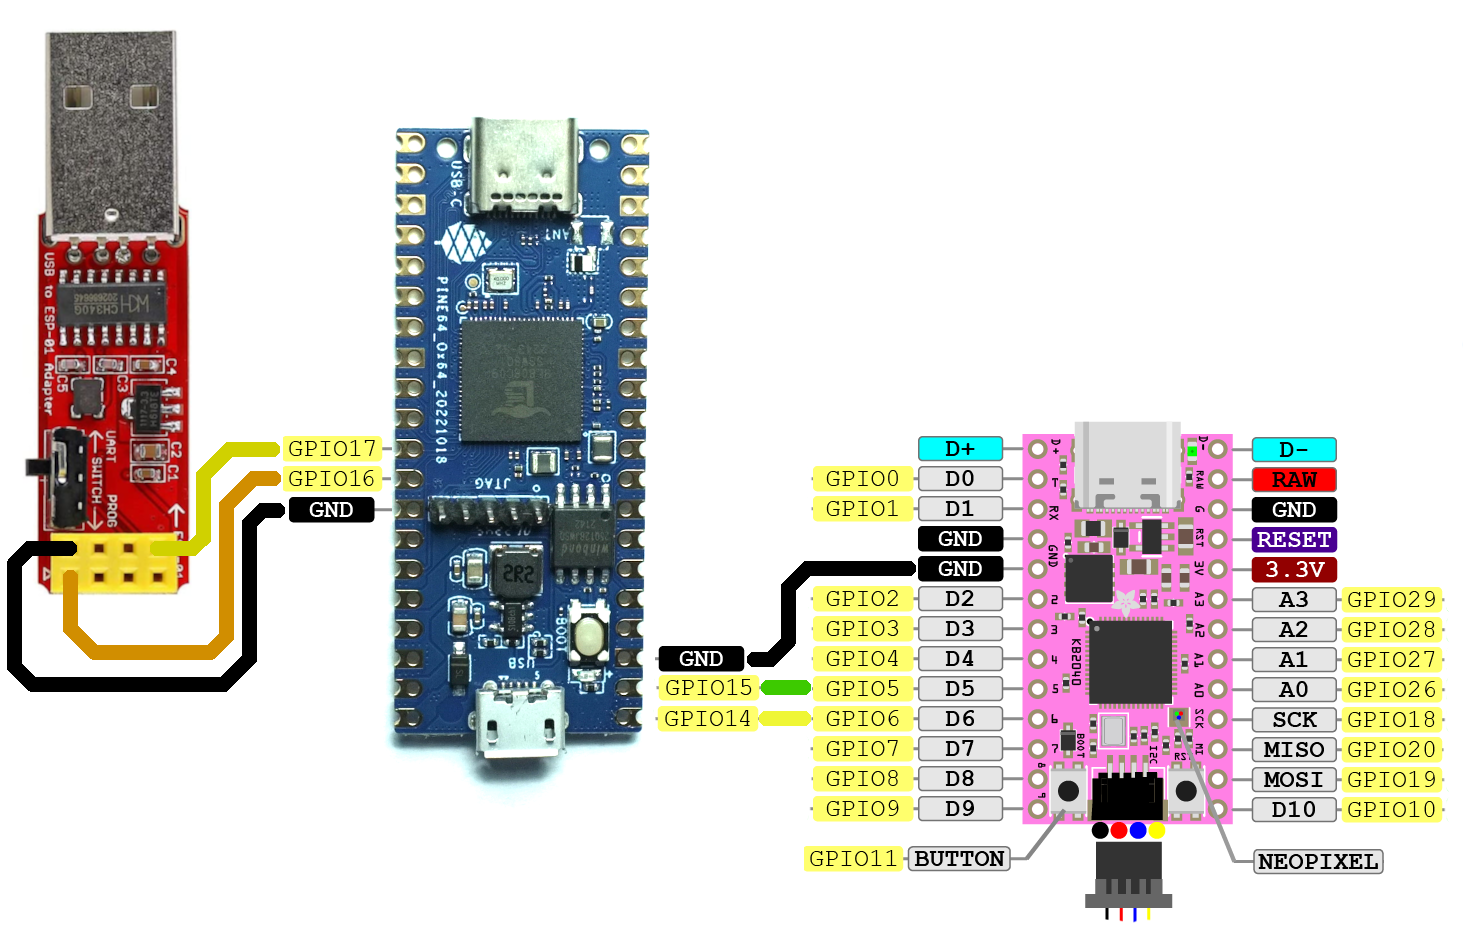
Nope... this needs to be programmed via the UART TX/RX pins.
In the picture above, you can see them hooked up to GPIO14 / GPIO15 and GND.
Hudle 2: The flashing tool Dev Cube will crash on launch when using Ubuntu on Wayland: you have to switch to Xorg instead.
$ ./BLDevCube-ubuntu
Warning: Ignoring XDG_SESSION_TYPE=wayland on Gnome. Use QT_QPA_PLATFORM=wayland to run on Wayland anyway.
/usr/lib/x86_64-linux-gnu/gio/modules/libdconfsettings.so: undefined symbol: g_log_structured_standard
Failed to load module: /usr/lib/x86_64-linux-gnu/gio/modules/libdconfsettings.so
GLib-GIO-Message: Using the 'memory' GSettings backend.  Your settings will not be saved or shared with other applications.

(BLDevCube-ubuntu:54646): GLib-GIO-ERROR **: Settings schema 'org.gnome.settings-daemon.plugins.xsettings' does not contain a key named 'antialiasing'
Trace/breakpoint trap (core dumped)
So, UART programming then... fine, we'll just use one of those little CH340G dongles.
I got one off Amazon, but it would not work... every time the handshake would fail in Dev Cube (hurdle 3).
Luckily, some people found out that you can program it with an RP2040 device, like the rPi Pico.
I had a KB2040 from Adafruit lying around, so used that.
Which puts us at hurdle 4: How to turn a KB2040 into a serial bridge between PC and Ox64?
Hook up GPIO-4 of the RP2040 to GPIO-15 of the Ox64. Hook up GPIO-5 of the RP2040 to GPIO-14 of the Ox64.
Also, connect the grounds, of course.
See below how to hook up for flashing the M0.\
Then we need to load our RP2040 with picoprobe which we can do by holding BOOT while powering up, and feeding it the uf2 file with picoprobe.
Ok, so now we can flash it then? Unfortunately, no, hurdle 5: DevCube is still not able to flash the Ox64, but we can use bflb-mcu-tool instead.
Ok, but with bflb-mcu-tool, we are all set! Are we?
Introducing hurdle 6: we need to modify the tool before it will work for us.
This means stripping DTR and RTS stuff from the tool by editing the
~/.local/lib/python3.10/site-packages/bflb_mcu_tool/libs/bflb_interface_uart.py file.
Here is my copy.
So with the Ox64 powered via MicroUSB, and the RP2040 connected to my PC using USB-C, I can finally flash something.
For that, I took the low_load_bl808_m0.bin from the bl808 linux guide and flashed it with:
$ bflb-mcu-tool --chipname=bl808 --port=/dev/ttyACM2 --baudrate=2000000 --firmware=out/low_load_bl808_m0.bin
After which I now get output from my Ox64, via my KB2040 to my PC:
dynamic memory init success,heap size = 156 Kbyte
E907 start...
mtimer clk:1000000
psram clk init ok!
Ok, a modest start, but the Ox64 is talking to my PC now! Yay!
Come back to my blog at a later time to see if I will manage to run Linux on the Ox64!
Because as I understand it, I also need to flash something to the D0 and then flash the actual OS as well.
UPDATE: Here is PART 2.